Author - Basamma B

Interfacing GPS with Arduino

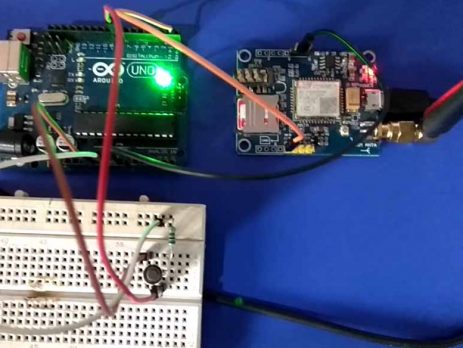
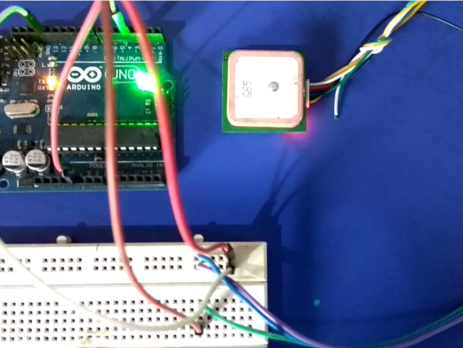
GPS stands for Global Positioning System. GPS module find the location (latitude, longitude, altitude) by comparing the time taken for receiving signals from satellites in its vicinity. GPS offers a great accuracy and also provides other data besides position coordinates. Components Required Arduino Uno GPS Breadboard Connecting Wires Hardware Circuit Diagram Interfacing GPS with Arduino - Circuit Diagram Connections Connect TX pin of GPS Module to pin number 4 of Arduino Uno. Connect RX pin of GPS Module to pin number 3 of Arduino Uno. Connect Red wire...

Interfacing GSM Module with Arduino

In this article, I am going to explain about interfacing of GSM Module with Arduino. Interfacing a GSM module to Arduino is pretty simple. We have to make only 3 connections between the GSM module and Arduino. For the working demonstration we will be sending an SMS to a particular number whenever a switch is pressed. Components Required Arduino Uno GSM Modem Switch 1kΩ Resistor Breadboard Connecting Wires Hardware Circuit Diagram Interfacing GSM Modem with Arduino - Circuit Diagram Connections Connect TX pin of GSM Module to...

IoT Temperature Data Logger Using ESP8266 and LM35

In this project, we are going to log and monitor temperature data over internet using ThingSpeak IoT server. And we can view the logged data and graph over time in their website. It is made using ESP8266 WiFi module and LM35 temperature sensor. ESP8266 WiFi chip reads the current temperature from LM35 using ADC and sends it to ThingSpeak server for live monitoring from anywhere in the world. Components Required ESP8266 LM35 Breadboard Connecting Wires Hardware Circuit Diagram LM 35 with ESP8266 - Circuit Diagram Connections Connect...

Digital Thermometer using LM35 Sensor and ESP8266

In this project, we are going to monitor the current room temperature over internet using ESP8266 programmed as a web server. It is accomplished by establishing data communication between ESP8266 WiFi module and LM35 temperature sensor using ADC. Components Required ESP8266 LM35 Breadboard Connecting Wires Hardware Circuit Diagram LM 35 with ESP8266 - Circuit Diagram Circuit Connection Connect 3.3V pin of ESP8266 to first pin of LM35 Connect A0 pin of ESP8266 to second pin of LM35 Connect GND pin of ESP8266 to third pin of LM35 LM35 An...

Interfacing Soil Moisture Sensor with Arduino

Introduction In this article, we are going to interface a Soil Moisture Sensor with Arduino Uno. We will measure the moisture content of soil in pot or farming field and by using this we can pour water into field based on preset values. This sensor measures the volumetric content of water inside the soil (based on resistance/conductivity) and gives the moisture level as output. The sensor is equipped with both analog and digital output, so it can be used in both analog...

Interfacing Rain Sensor with Arduino

In this article we are going to explain about interfacing Rain Sensor with Arduino. The rain sensor module is an easy tool for rain detection. It operates as a switch when raindrop falls through the raining board and also it measures rainfall intensity. The module features, a rain sensing board and the control board that is separate for more convenience, power indicator LED and an adjustable sensitivity though a potentiometer. Rain Sensor Module Raindrop sensor is basically a board on which nickel...

LED Control by ESP8266 as Web Server – IoT

Here we are programing ESP8266 as a web server, the chip enables WiFi connectivity and can be turned into a small functioning web server. We will connect ESP8266 to our local wifi network and we can control the LED through this local network. If you need to control it through internet you can use DDNS and port forwarding. Components Required ESP8266 Resistor 470Ω LED USB cable Connecting wires Hardware Circuit Diagram LED Control From Web - Circuit Diagram Connections: Connect LED positive terminal to D0...

Connecting ESP8266 to WiFi Network – Beginners Guide

ESP8266 is the one of the most popular WiFi SoC (System on Chip) available today. It finds a lot of applications in IoT (Internet of Things), Home Automation fields. In this tutorial we will see how can we connect ESP8266 to a WiFi network. Modes of Operation ESP8266 has 3 operation modes. Those are: Station Mode Soft Access Point Mode Station + Access Point Mode Station Mode: Connecting to one specific network: ST  – Station mode in which ESP acts as a device & connects...

>