Building Your Own PCB : Printed Circuit Boards
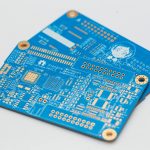
The electronic product construction technique for many is the printed circuit board, or PCB. There are a number of ways to build a custom printed circuit board. Good quality copper clad should be used for manufacturing of printed circuit board. Materials that you use to make printed circuit boards come in various forms. You can buy either single- or double-sided copper clad. Unless you’re making a double-sided board, stick with single-sided clad.
The board that you use to make your PCB should be only as large as the circuit layout, no larger. If the board is too large, cut it with a saw. First draw or scribe a line in the copper to ensure a straight cut. You can then smooth the edges of the board with a file or fine-grit sandpaper.
The easiest way to make a printed circuit board is to use a pre-printed template of the required circuit. Be sure that you transfer the layout to the board with the proper orientation. Reversing the layout makes a mirror-image of the board, leaving you with a pretty useless circuit board. If you reverse the layout, the connections for any integrated circuits are backwards; at best, the circuit just doesn’t work, and at worst, it can burn out components.
Follow these steps to prepare the board
- First, clean the board thoroughly. Handle the board by the edges only.
- Place the PCB copper-side up on an ironing board.
- Cut the transfer film to size so that it’s not larger than the board.
- Carefully place the transfer film over the board so that the toner side faces the copper clad.
- Secure the film into place with some strips of masking tape, but don’t tape over toner areas.
- Place a small piece of cloth or several layers of paper towel over the PCB and transfer film.
- Let the iron warm up and then apply the iron to the board. Move the iron back and forth in slow in even strokes.
- Apply steady and firm pressure for 15 to 20 seconds.
- Wait 10 to 15 seconds, then gently lift the cloth.
- Carefully peel back a small corner of the film to see if the toner has transferred to the copper clad.
- If the toner hasn’t completely transferred to the copper, replace the film and apply the iron for another 15 to 20 seconds.
Follow these steps to etch the board:
- Pour the etchant normally ferric chloride, into the plastic tray carefully, avoiding spills and splashes.
- Dunk the board into the tray and continually rock it back and forth.
- Keep the board in the solution for 10 to 30 minutes (depending on the type and strength of the etchant) or until the etchant has removed all the excess copper. Keep shaking the tray gently moving back and forth.
- Use the plastic or wooden tongs to lift the board out of the tray from time to time to check progress.

The etchant removes the copper, starting from the edges and areas close to resist. If you’ve gone through these steps, you’ve almost created your finished board. The etchant has completed etching when you can’t see any traces of exposed copper. Now you can drill the board and place the components in it.


