Digital Clock using PIC Microcontroller and DS1307 RTC
Contents
A Digital Clock can be made easily by using PIC Microcontroller, DS1307 and a 16×2 LCD. I have already posted about Interfacing DS1307 RTC with PIC Microcontroller. The DS1307 RTC can work either in 24-hour mode or 12-hour mode with AM/PM indicator. It automatically adjusts for months fewer than 31 days including leap year compensation up to year 2100. DS1307 comes with built-in power sensing circuit which senses power failures and automatically switches to back up supply. We can provide a 3V CMOS Battery for that. Communication between PIC Microcontroller and DS1307 takes place through I²C Bus.
Components Required
- PIC 16F877A Microcontroller
- DS1307 RTC
- 16×2 LCD
- 8MHz Crystal
- 32.768KHz Crystal for RTC
- 3V Battery
- 2x 22pF Capacitors
- 0.1μF Capacitor
- 4x 10KΩ Resistors
- 10KΩ Preset
- 2x 2.2KΩ Resistors
- 4.7KΩ Resistor
- 3x Micro Switches (Push Button)
- 5V Power Supply
Prerequisites
I recommend reading following articles before going further.
Circuit Diagram – Digital Clock

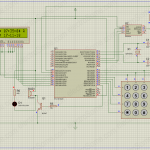
I hope that you can easily understand the circuit diagram. The circuit is powered using a 5V power supply. 8MHz crystal is connected to PIC Microcontroller to provide necessary clock for the operation. An RCR (Resistor-Capacitor-Resistor) made using 10KΩ, 0.1µF, 4.7KΩ is connected to MCLR pin of PIC Microcontroller as recommended by Microchip. It will work fine even if you tie MCLR pin directly to VDD but Microchip doesn’t recommends it. DS1307 RTC is connected to PIC microcontroller via I2C bus. Pull up resistors connected to I2C bus is very important, please make sure that you are using correct values for it. An additional power supply (usually a battery or button cell) is connected to DS1307 RTC for running the clock during power failures. This circuit will function even without that battery also but the clock will stop and reset during power failure.
MikroC Code
// LCD module connections
sbit LCD_RS at RB2_bit;
sbit LCD_EN at RB3_bit;
sbit LCD_D4 at RB4_bit;
sbit LCD_D5 at RB5_bit;
sbit LCD_D6 at RB6_bit;
sbit LCD_D7 at RB7_bit;
sbit LCD_RS_Direction at TRISB2_bit;
sbit LCD_EN_Direction at TRISB3_bit;
sbit LCD_D4_Direction at TRISB4_bit;
sbit LCD_D5_Direction at TRISB5_bit;
sbit LCD_D6_Direction at TRISB6_bit;
sbit LCD_D7_Direction at TRISB7_bit;
// End LCD module connections

unsigned short read_ds1307(unsigned short address)
{
  unsigned short r_data;
  I2C1_Start();
  I2C1_Wr(0xD0); //address 0x68 followed by direction bit (0 for write, 1 for read) 0x68 followed by 0 --> 0xD0
  I2C1_Wr(address);
  I2C1_Repeated_Start();
  I2C1_Wr(0xD1); //0x68 followed by 1 --> 0xD1
  r_data=I2C1_Rd(0);
  I2C1_Stop();
  return(r_data);
}

void write_ds1307(unsigned short address,unsigned short w_data)
{
  I2C1_Start(); // issue I2C start signal
  //address 0x68 followed by direction bit (0 for write, 1 for read) 0x68 followed by 0 --> 0xD0
  I2C1_Wr(0xD0); // send byte via I2C (device address + W)
  I2C1_Wr(address); // send byte (address of DS1307 location)
  I2C1_Wr(w_data); // send data (data to be written)
  I2C1_Stop(); // issue I2C stop signal
}

unsigned char BCD2UpperCh(unsigned char bcd)
{
  return ((bcd >> 4) + '0');
}

unsigned char BCD2LowerCh(unsigned char bcd)
{
  return ((bcd & 0x0F) + '0');
}

int Binary2BCD(int a)
{
  int t1, t2;
  t1 = a%10;
  t1 = t1 & 0x0F;
  a = a/10;
  t2 = a%10;
  t2 = 0x0F & t2;
  t2 = t2 << 4;
  t2 = 0xF0 & t2;
  t1 = t1 | t2;
  return t1;
}

int BCD2Binary(int a)
{
  int r,t;
  t = a & 0x0F;
  r = t;
  a = 0xF0 & a;
  t = a >> 4;
  t = 0x0F & t;
  r = t*10 + r;
  return r;
}

int second;
int minute;
int hour;
int hr;
int day;
int dday;
int month;
int year;
int ap;

unsigned short set_count = 0;
short set;

char time[] = "00:00:00 PM";
char date[] = "00-00-00";

void main()
{
  I2C1_Init(100000); //DS1307 I2C is running at 100KHz
  CMCON = 0x07;   // To turn off comparators
  ADCON1 = 0x06;  // To turn off analog to digital converters
  TRISA = 0x07;
  PORTA = 0x00;
  Lcd_Init();                        // Initialize LCD
  Lcd_Cmd(_LCD_CLEAR);               // Clear display
  // Lcd_Cmd(_LCD_CURSOR_OFF);          // Cursor off
  Lcd_Cmd(_LCD_BLINK_CURSOR_ON);
  Lcd_out(1,1,"Time:");
  Lcd_out(2,1,"Date:");

  do
  {
    set = 0;
    if(PORTA.F0 == 0)
    {
      Delay_ms(100);
      if(PORTA.F0 == 0)
      {
        set_count++;
        if(set_count >= 7)
        {
          set_count = 0;
        }
      }
    }
    if(set_count)
    {
      if(PORTA.F1 == 0)
      {
        Delay_ms(100);
        if(PORTA.F1 == 0)
          set = 1;
      }
      if(PORTA.F2 == 0)
      {
         Delay_ms(100);
         if(PORTA.F2 == 0)
           set = -1;
      }
      if(set_count && set)
      {
        switch(set_count)
        {
          case 1:
                  hour = BCD2Binary(hour);
                  hour = hour + set;
                  hour = Binary2BCD(hour);
                  if((hour & 0x1F) >= 0x13)
                  {
                    hour = hour & 0b11100001;
                    hour = hour ^ 0x20;
                  }
                  else if((hour & 0x1F) <= 0x00)
                  {
                     hour = hour | 0b00010010;
                     hour = hour ^ 0x20;
                  }
                  write_ds1307(2, hour); //write hour
                  break;
          case 2:
                  minute = BCD2Binary(minute);
                  minute = minute + set;
                  if(minute >= 60)
                    minute = 0;
                  if(minute < 0)
                    minute = 59;
                  minute = Binary2BCD(minute);
                  write_ds1307(1, minute); //write min
                  break;
          case 3:
                  if(abs(set))
                  write_ds1307(0,0x00); //Reset second to 0 sec. and start Oscillator
                  break;
          case 4:
                  day = BCD2Binary(day);
                  day = day + set;
                  day = Binary2BCD(day);
                  if(day >= 0x32)
                    day = 1;
                  if(day <= 0)
                    day = 0x31;
                  write_ds1307(4, day); // write date 17
                  break;
          case 5:
                  month = BCD2Binary(month);
                  month = month + set;
                  month = Binary2BCD(month);
                  if(month > 0x12)
                    month = 1;
                  if(month <= 0)
                    month = 0x12;
                  write_ds1307(5,month); // write month 6 June
                  break;
          case 6:
                  year = BCD2Binary(year);
                  year = year + set;
                  year = Binary2BCD(year);
                  if(year <= -1)
                    year = 0x99;
                  if(year >= 0x50)
                    year = 0;
                  write_ds1307(6, year); // write year
                  break;
        }

      }
    }

    second = read_ds1307(0);
    minute = read_ds1307(1);
    hour = read_ds1307(2);
    hr = hour & 0b00011111;
    ap = hour & 0b00100000;
    dday = read_ds1307(3);
    day = read_ds1307(4);
    month = read_ds1307(5);
    year = read_ds1307(6);

    time[0] = BCD2UpperCh(hr);
    time[1] = BCD2LowerCh(hr);
    time[3] = BCD2UpperCh(minute);
    time[4] = BCD2LowerCh(minute);
    time[6] = BCD2UpperCh(second);
    time[7] = BCD2LowerCh(second);

    date[0] = BCD2UpperCh(day);
    date[1] = BCD2LowerCh(day);
    date[3] = BCD2UpperCh(month);
    date[4] = BCD2LowerCh(month);
    date[6] = BCD2UpperCh(year);
    date[7] = BCD2LowerCh(year);

    if(ap)
    {
      time[9] = 'P';
      time[10] = 'M';
    }
    else
    {
      time[9] = 'A';
      time[10] = 'M';
    }
    Lcd_out(1, 6, time);
    Lcd_out(2, 6, date);
    Delay_ms(100);
  }while(1);
}
You can download the MikroC Source Code and Proteus Files etc at the end of this article. Here I explains the Source Code and different functions used in it.
The Three points to be noted while editing or creating program for this project:
- DS1307 RTC is fully Binary Coded Decimal (BCD) clock/calender. So the data read from DS1307 should be converted to required format according to our needs and data to be written to DS1307 should be in BCD format.
- Library for Interfacing LCD With PIC Microcontroller of MikroC needs Character or String Data. So data to be displayed in the LCD Screen should be converted to Character.
- Addition and Subtraction cannot be directly applied on BCD. Here I first convert BCD to Binary. Then addition and subtraction can be simply applied on Binary. Then the Binary is converted back to BCD.
Functions that are used for reading and writing data from DS1307 are explained in the article Interfacing DS1307 with PIC Microcontroller please refer it. BCD2UpperCh() and BCD2LowerCh() are the two functions used to convert BCD to Character. Hour, Minute, Second, Date, Month and Year data are stored in DS1307 in separate 8-bit registers in BCD format. We read the data of these registers to access time/date. BCD2UpperCh() converts most significant 4 bits to corresponding character and BCD2LowerCh() converts least significant 4 bits to corresponding character.
The BCD2Binary() converts the BCD data read from the RTC to corresponding Binary for addition or subtraction and Binary2BCD converts the Binary back to BCD.
Bit 6 of Hour register is defined as the 24-hour or 12-hour mode selection bit. When this bit is made high, 12-hour mode is selected and Bit 5 will represent AM/PM (Logic High represents PM).
Note : During the first setup, you might need to set the time to clock to start running.
If you have any doubts regarding the Program please do Comment.
Output
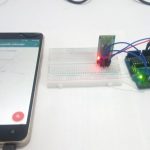
Here is the photograph of this project tested in our lab.

Download Here
You can download complete project files here.



Please help me to change the 24 hour format.
Try adjusting LCD contrast.
It won’t be the problem with code. I have experienced similar issue. Refer the datasheet and follow the recommended practices to increase the accuracy. I recommend to use some other RTC chips like DS3231 for better accuracy.
i wrote code for digital clock using pic16f886 and ds1307…….code working but while running for few weeks…..minutes gets increases upto 1- 5 from set time……. why?
i attach my code here………what is the problem? help me
unsigned int hex(int y)
{
switch(y)
{
case 1: return 0xCF;
case 2: return 0xA4;
case 3: return 0x86;
case 4: return 0x8B;
case 5: return 0x92;
case 6: return 0x98;
case 7: return 0xC7;
case 8: return 0x80;
case 9: return 0x83;
case 0: return 0xC0;
}
}
unsigned short ReadI2C(unsigned short address)
{
unsigned short temp;
I2C1_Start();
I2C1_Wr(0xD0); //address 0x68 followed by direction bit (0 for write, 1 for read) 0x68 followed by 0 –> 0xD0
I2C1_Wr(address);
I2C1_Repeated_Start();
I2C1_Wr(0xD1); //0x68 followed by 1 –> 0xD1
temp=I2C1_Rd(0);
I2C1_Stop();
return(temp);
}
void write_ds1307(unsigned short address,unsigned short w_data)
{
I2C1_Start(); // issue I2C start signal
//address 0x68 followed by direction bit (0 for write, 1 for read) 0x68 followed by 0 –> 0xD0
I2C1_Wr(0xD0); // send byte via I2C (device address + W)
I2C1_Wr(address); // send byte (address of DS1307 location)
I2C1_Wr(w_data); // send data (data to be written)
I2C1_Stop(); // issue I2C stop signal
}
int Binary2BCD(int a)
{
int t1, t2;
t1 = a%10;
t1 = t1 & 0x0F;
a = a/10;
t2 = a%10;
t2 = 0x0F & t2;
t2 = t2 <> 4;
t = 0x0F & t;
r = t*10 + r;
return r;
}
unsigned short set_count = 0;
short set;
int minute;
int hour;
int a=1,b=1;
char min,hr,t,l=10;
void main()
{
I2C1_Init(100000);
OSCCON.IRCF0=1;
OSCCON.IRCF1=1;
OSCCON.IRCF2=1;
ANSEL = 0;
ANSELH = 0;
TRISB=0x00;
TRISC.F0=0;
TRISC.F3=1;
TRISC.F4=1;
TRISC.F5=0;
TRISA.F0=1;
TRISA.F1=1;
TRISA.F2=0;
TRISE.F3=1;
TRISA.F5=0;
while(1)
{
// ReadI2C(7);
min=ReadI2C(1);
t= ReadI2C(2);
hr = t & 0b00011111;
min=((min & 0xf0)>>4)* 10 +(min & 0x0f);
hr=((hr & 0xf0)>>4)* 10 +(hr& 0x0f);
if(a==1)
{
PORTB = hex(min%10);
PORTC.F5= 1;
Delay_ms(5);
PORTC.F5=0;
PORTB = hex((min/10)%10);
PORTC.F0 = 1;
Delay_ms(5);
PORTC.F0 = 0;
}
if(b==1)
{
PORTB = hex(hr%10);
PORTA.F5 = 1;
Delay_ms(5);
PORTA.F5 = 0;
PORTB = hex((hr/10)%10);
PORTA.F2 = 1;
Delay_ms(5);
PORTA.F2 = 0;
}
set = 0;
if(PORTE.F3== 0)
{
Delay_ms(100);
if(PORTE.F3 == 0)
{
set_count++;
if( set_count==1)
{
a=0;
b=1;
}
if( set_count==2)
{
a=1;
b=0;
}
if(set_count >= 3)
{
set_count = 0;
a=1;
b=1;
write_ds1307(0,0×00);
write_ds1307(7,0×10);
}
}
}
if(set_count)
{
if(PORTA.F0 == 0)
{
Delay_ms(100);
if(PORTA.F0 == 0)
set = 1;
}
if(PORTA.F1 == 0)
{
Delay_ms(100);
if(PORTA.F1 == 0)
set = -1;
}
if(set_count && set)
{
switch(set_count)
{
case 1:
hour = BCD2Binary(hour);
hour = hour + set;
Delay_ms(250);
hour = Binary2BCD(hour);
if((hour & 0x1F) >= 0x13)
{
hour = hour & 0b11100001;
hour = hour ^ 0x20;
}
else if((hour & 0x1F) = 60)
minute = 0;
if(minute < 0)
minute = 59;
minute = Binary2BCD(minute);
write_ds1307(1, minute); //write min
break;
}
}
}
}
}
Thank you for the circuit and explanation. As I do not have the Mickro compiler, I constructed the clock and programmed the PIC using the hex file available in the download. The LCD display just shows black boxes only in the first line after proper adjustment of the contrast. I could not find any other person having a similar comment and am at a loss of what to do. Any suggestion ? Thanks
Could anyone tell me how to set time for first setup…?!!
Plz explain how this conversion is taking place.
int Binary2BCD(int a) //Rehman! Here ‘a’ is the given binary number
{
int t1, t2;
t1 = a%10; //Rehman! This will give the 2nd digit ie right dgit
t1 = t1 & 0x0F;
a = a/10; //This will give the First digit i.e left digit……………………
t2 = a%10;
t2 = 0x0F & t2;
t2 = t2 << 4; t2 = 0xF0 & t2; t1 = t1 | t2; return t1; }
Hi, Sir will you provide the header files used in this code specially for the LCD and I2C
You can compare the time and do it easily. We have a premium and professionally developed school bell project. If you need just drop a mail to [email protected]
hi, how to set an alarm for this project?
Hi Ligo,
your code is of great help.
can you plz tell me where is the abs() function you are calling in case 3. {if(abs(set))}
thank you
hey….what if I use 2 MHz crystal oscillator for the RTC? I tried to use and it isn’t working.
Hi they sir Ligo George!! your code was awesome :)) I would like to ask if this code can use in PIC16F887 using same code or need to modify??
Hi Ligo George
hi PRATIK PANCHAL
I am facing a problem, after 11:59: 59 AM when changed to 12:00:00 PM it displayed 12:00:00 AM. After 17:59:59 AM the display shows 00:00:00 PM. Please help me
How to modify code to give time stroke; say at 10 it give 10 stroke/beeps at 2 it give 2 beeps . Can I use 7 segment LED in place of LCD? IF yes give detail.
This is for MikroC Pro only.
Ok, that is right.
i want this program in c language to use in MPLAB with HighTech-C compiler…
make sure the hour register(2) in ds1307 starts in 0x40 for 12 hours mode. because this code above only works in 12 hours mode.
If it is working in proteus, it should work in hardware without any problems. Check the pull up resistors of I2C bus. Use 1.8K or 2.2K.
Hi ,
I am working on pic18f45k50 with rtc ds1307zn+ and i want to display date n time . the above code is working well in proteus but when same program dumping in hardware its not showing any thing on the screen . Please let me know the modifications to be done in code and hpw to set the time n date automatically as i have not provided any switch.
regards,
manu
I2C is a standard digital communication technology/protocol. I don’t understand what is your doubt ?
Yes, you can easily convert it to MPLAB. You may make use of our I2C libraries for that.
https://electrosome.com/i2c-pic-microcontroller-mplab-xc8/
It is for adjusting the contrast of the LCD.
Hi can you elaborate on the I2c bus
How does it come into picture while implementing hardware ?
Hi, is it possible to do the coding in mplab, thank you.
hi, could you tell me what rv1 is thank you, is it a variable resistor.
Thnx for such an awsome work. But has anyone noticed, the last digits cannot be set to 15 (for 2015). it goes to 14 and and down again. Please help.
Hi Ligo George, thanks for sharing your programming. After using your code found something abormal . After time of 12:59:59 PM ,it become 13:00:00 PM (actual must be 01:00:00 AM). Seen like setting hour part need to do something (put bit 6 of DS1307 to high for 12 hour mode).
if((hour & 0x1F) >= 0x13)
{
hour = hour & 0b11100001;
hour = hour ^ 0x20; //need to modify here
hour = hour | 0b01100000; // or just add this line
}
Sorry, It is impossible for me to do programming for each and everyone helping me.
If you want to hire me, please drop a mail to [email protected]
It is for adjusting contrast of LCD.
Hi, thanks for your programming.
I am looking a circuit, that can control a particular device ( ie: home light) on particular time every day like alarm with long duration. Can you help me with your programming ?
Hi Sir, can you please tell me what is RV1(resistor) and connection for pin 3 (VEE) of LCD
Just connect it as per the pin names… SCL SDA … RB etc
I hope that it will work fine with 18F4550 if you rebuild the project after changing the device in mikroc project settings.
Hi,
I can modify connection according to PIC18F4550,So Please suggest me Code modification according to PIC18F4550.
Regards,
Pratik
Hi,
How can I modify this code for PIC18F4550 using MickroC 2013 v6.0
Regards,
Pratik
It is already in the above project.
Check the bits of hour register. I hope that the following link will help you.
https://electrosome.com/topic/ds1307rtc-pic-microcontroller/
It has the register map.
Please help me to check AM or PM .
This is 24hr format . So , I want to mean greater than 8PM.
Time greater than 20 means ??
Try this link : https://electrosome.com/topic/ds1307rtc-pic-microcontroller/
I have a problem with this code.The problem is when the time is greater than 20 , it restart from 0 . Please help me with this problem.
Good day sir. Pls can you help me explain this part of he code. its not clear
case 1:
hour = BCD2Binary(hour);
hour = hour + set;
hour = Binary2BCD(hour);
if((hour & 0x1F) >= 0x13)
{
hour = hour & 0b11100001;
hour = hour ^ 0x20;
}
else if((hour & 0x1F) <= 0x00)
{
hour = hour | 0b00010010;
hour = hour ^ 0x20;
}
write_ds1307(2, hour); //write hour
break;
I used 33K. It was worked without problems.
You can download it above.
You should use 2.2K or 1.8K pull ups… otherwise RTC reading will not work properly…
That is not the reason for LCD black boxes…
Make sure that LCD connections are correct.. and try adjusting contrast adjusting preset.
I request to share the software code at [email protected].
Hi sir,
is it necessary to use 2.2k as pull ups,,,im using 10k resistors….i hav a problem that my lcd,,its not working properly,,,one row of blank rectangular blocks are displayed..,,what is the problem?????
Check the datasheet of DS1307. You can see that last 5 bits of HOUR memory are only used to represent magnitude time in 12 hour mode.
why this , hr = hour & 0b00011111; is used bcs second & minute directly taken pls explain.pls be kind enough to write comment difficult functions i am continuosly following your tute
Sir,I m trying to build this code in microc ,but it showing that variables t2 and t are eliminated by optimizer and even i dump yhe code in my controller ,it is just displaying the names time and date,nothing more than this,please help me sir
we can implement this on pcb?
Hi,
Thanks for the program
I want to edit it and put three buttons to make an alarm, but each time I add a piece of code, the LCD flashes with date and time words without showing any date or time or doesn’t show anything at all
so is there something I should do to make adjustment to the code or where should I put the new code segments in such a way that it won’t affect the original code and will allow the user to enter the alarm time he wants
thanks in advance
regards,
please give me codding for digital clock using pic 16f877a and ds1307
Hey man, can you please modify the code to run in 24 hour mode? because i don’t know how, i am not good on software, only hardware. Thanks.
Hi,
I converted your code for use on my PIC32MX795F512L chip but all I get is ? for time and date. I have RTC2 with 1307 RTC on SDA1 – RA15 and SCL1 on RA14. I’m not using the EEPROM so there should not be a conflict. I have RA14 and RA15 pulled high. I am using a mikroElecktronika Fusion 7 development board.
Any Ideas?
Thanks
Sid
// LCD module connection EasyPic Fusion V7 PIC32MX795F512L
sbit LCD_RS at LATD9_bit;
sbit LCD_EN at LATD10_bit;
sbit LCD_D4 at LATE4_bit;
sbit LCD_D5 at LATE5_bit;
sbit LCD_D6 at LATE6_bit;
sbit LCD_D7 at LATE7_bit;
sbit LCD_RS_Direction at TRISD9_bit;
sbit LCD_EN_Direction at TRISD10_bit;
sbit LCD_D4_Direction at TRISE4_bit;
sbit LCD_D5_Direction at TRISE5_bit;
sbit LCD_D6_Direction at TRISE6_bit;
sbit LCD_D7_Direction at TRISE7_bit;
// End LCD module connections
unsigned short read_ds1307(unsigned short address)
{
unsigned short r_data;
I2C1_Start();
I2C1_Write(0xD0); //address 0x68 followed by direction bit (0 for write, 1 for read) 0x68 followed by 0 –>0xD0
I2C1_Write(address);
I2C1_Restart();
I2C1_Write(0xD1); //0x68 followed by 1 –> 0xD1
r_data=I2C1_Read(0);
I2C1_Stop();
return(r_data);
}
void write_ds1307(unsigned short address,unsigned short w_data)
{
I2C1_Start(); // issue I2C start signal
//address 0x68 followed by direction bit (0 for write, 1 for read) 0x68 followed by 0 –> 0xD0
I2C1_Write(0xD0); // send byte via I2C (device address + W)
I2C1_Write(address); // send byte (address of DS1307 location)
I2C1_Write(w_data); // send data (data to be written)
I2C1_Stop(); // issue I2C stop signal
}
unsigned char BCD2UpperCh(unsigned char bcd)
{
return ((bcd >> 4) + ‘0’);
}
unsigned char BCD2LowerCh(unsigned char bcd)
{
return ((bcd & 0x0F) + ‘0’);
}
int Binary2BCD(int a)
{
int t1, t2;
t1 = a%10;
t1 = t1 & 0x0F;
a = a/10;
t2 = a%10;
t2 = 0x0F & t2;
t2 = t2 <> 4;
t = 0x0F & t;
r = t*10 + r;
return r;
}
int second;
int minute;
int hour;
int hr;
int day;
int dday;
int month;
int year;
int ap;
unsigned short set_count = 0;
short set;
char time[] = “00:00:00 PM”;
char date[] = “00-00-00″;
void main()
{
I2C1_Init(100000); //DS1307 I2C is running at 100KHz
CHECON = 0x32; // Prefetch cache pic32mx
AD1PCFG = 0xFFFF; // Configure AN pins as digital I/O pic32mx
TRISA = 0x07;
PORTA = 0x00;
Lcd_Init(); // Initialize LCD
Lcd_Cmd(_LCD_CLEAR); // Clear display
Lcd_Cmd(_LCD_CURSOR_OFF); // Cursor off
Lcd_out(1,1,”Time:”);
Lcd_out(2,1,”Date:”);
do
{
set = 0;
if(PORTA.F0 == 0)
{
Delay_ms(100);
if(PORTA.F0 == 0)
{
set_count++;
if(set_count >= 7)
{
set_count = 0;
}
}
}
if(set_count)
{
if(PORTA.F1 == 0)
{
Delay_ms(100);
if(PORTA.F1 == 0)
set = 1;
}
if(PORTA.F2 == 0)
{
Delay_ms(100);
if(PORTA.F2 == 0)
set = -1;
}
if(set_count && set)
{
switch(set_count)
{
case 1:
hour = BCD2Binary(hour);
hour = hour + set;
hour = Binary2BCD(hour);
if((hour & 0x1F) >= 0x13)
{
hour = hour & 0b11100001;
hour = hour ^ 0x20;
}
else if((hour & 0x1F) = 60)
minute = 0;
if(minute = 0x32)
day = 1;
if(day 0x12)
month = 1;
if(month <= 0)
month = 0x12;
write_ds1307(5,month); // write month 6 June
break;
case 6:
year = BCD2Binary(year);
year = year + set;
year = Binary2BCD(year);
if(year = 0x50)
year = 0;
write_ds1307(6, year); // write year
break;
}
}
}
second = read_ds1307(0);
minute = read_ds1307(1);
hour = read_ds1307(2);
hr = hour & 0b00011111;
ap = hour & 0b00100000;
dday = read_ds1307(3);
day = read_ds1307(4);
month = read_ds1307(5);
year = read_ds1307(6);
time[0] = BCD2UpperCh(hr);
time[1] = BCD2LowerCh(hr);
time[3] = BCD2UpperCh(minute);
time[4] = BCD2LowerCh(minute);
time[6] = BCD2UpperCh(second);
time[7] = BCD2LowerCh(second);
date[0] = BCD2UpperCh(day);
date[1] = BCD2LowerCh(day);
date[3] = BCD2UpperCh(month);
date[4] = BCD2LowerCh(month);
date[6] = BCD2UpperCh(year);
date[7] = BCD2LowerCh(year);
if(ap)
{
time[9] = ‘P’;
time[10] = ‘M’;
}
else
{
time[9] = ‘A’;
time[10] = ‘M’;
}
Lcd_out(1, 6, time);
Lcd_out(2, 6, date);
Delay_ms(100);
}while(1);
}
how is 0x68 followed by 0=D0?
hie there you have a nice working code, may you please add uart interface to let the user correct time using the computer…..please sir
Hi Ligo, first of all this is a very good project, well done.
I have one problem with it. When I want to bush a button, or just put my finger close to the circuit, the time and date values from DS1307 changes to “?”.on the LCD. The fix datas from PIC stays stable(“Time”,”Date”). I try almost everything, but I could’nt solve this problem. The clock is running well and the LCD shows good values, until I don’t put my hand close to the cicuit. But when i tap the gnd somwhere it’s get stable???
Do You have some advice, or tip?
Thank You
please can u send me the code to [email protected] i want to write a report about this…pls
thank you very much the project is working perfect…..but if i switch of the power and on it again the clock starts from the default, but it shouldnt bcos of the ds1307, or am confusing the function of ds1307?
I2C is a serial communication interface…
The crystal of DS1307 is very small… It is hidden below a wire.
nop…. 8MHz for pic and 32.768kHz for DS1307
also i dont see any capacitor connected to the pic and also no crystal connected to the ds1307..
what is 12c bus is it the same thing as ds1307? and also u connect a resistor to pin1 of the pic what is the value?
ok 8mega for both ds1307 and pic right?
1. 10K resistors are used as PULL UP resistors… When the switch is not pressed.. the input pin of PIC will read it as HIGH… When the switch is pressed it becomes LOW..
2. 10K Variable Resistor is used to adjust the contrast of the LCD
3. 2.2K resistors are used as the PULL UP resistors for I2C Bus.. SCL and SDA are open collector outputs..
I used 8MHz..
You needn’t any header files.. Those functions are predefined in the MikroC Pro Compiler.. .. You may change the crystal frequency in the MikroC Project Settings..
please from the schematic above am seeing one 10k variable resistor, three 10k resistor, and two 22k resistor, but from what you implemented above i mean the picture you took above, am seein more than the number of resistors theirs one additional resistor am seeing in the picture please can you tell me why and how comes?
AND ALSO I WANT TO KNOW IF THE TWO CAPACITORS ARE 4MHZ..(4 MEGA HZ)
LIKE IS THERE ANY LCD HEADER FILE IN THE DIRECTORY?
SORRY I WANT TO ASK IF LCD HAVE ANY COMMAND THAT IS INCLUDED IN THE DIRECTORY
THANKS……
I will try to include it.. in future projects..
ok, but it will be better if theres a video, for better illustration….so i can follow the video…
Nop..
PLEASE IS THERE ANY VIDEO TO WATCH ABOUT THIS PROJECT?
Yes you can use it… use mikroc’s PWM functions to generate pwm…
See our pwm tutorials..
It is difficult to explain.. please see the datasheet of DS1307… and see the hour register……
All bits of hour register are not used to indicated the value of hour…
Sir, i would like to know how to generate a PWM signal with duty-cycle adjustment according to real time. Can i use the DS1307 RTC??
Could you elaborate ,please ! I still feel confused around if-else condition in case 1 for set_count .
DS1307 is a BCD clock.. but .. C operators are decimal.. that steps are used to convert decimal to bcd.. and the if conditions checks for upper and lower limits of hour…
similarly in case 6 it checks for upper and lower limits of year … not year>=50.. it is year>=0x50
Hello, we don’t have time to do projects for each and everyone commenting here… If you have any doubts related to above article.. ask us..
I’m sorry but i felt weird when i looked the program and tried to extract the procedure of setting hour mode and AM/PM.I didn’t get case:1 for set_count and condition(year>=50) in case :6.
I urgently need help !
Sir, I’m asking help from you. i’m a graduating student but my problem is my thesis. it is a time based project.. i would like to ask some help that deals with time and uses pic16F877a. thank you
try this : http://electrosome.com/matrix-keypad-pic-mikroc-library/
and also to be displayed in the LCD.
sir, I would like to ask some help about setting the time in the ds1307 using keypad, can you help me sir?
Krishnappa Gururaj please can u help me build this project on pcb i want to buy it from you..thanks..
DS1307 can work in 12 or 24 hour mode… you can set it..
When it is in 12 hour mode… you need to specify AM or PM
Sir I didn’t get the logic behind Changing HOUR mode and AM/PM indication.
Will you elaborate, please !!!
i cant find one please help me
Sorry… I am very busy… Try searching for someone near to you…
Give the above circuit diagram and codes to someone who have experience with project development….
northern cyprus, close to turkey….i need it by january 3…
Your Country??
When did you need this??
only to india? please i will pay the shipping fee….i dont mind the cost…i need it very urgent…
Hello.. please try it .. it is simple..
Just download mikroc pro.. from http://www.mikroe.com/ and try.. Now we can ship projects only to India..
Can you said for me practically ,at the first switch on to the curuit what will be displayed?
thank you very much for your help
Sir, DS1307 ,It needs 5V to it’s Vcc pin???
Thanks for the feedback..
Sorry… now we have a lot of server problems… please try now…
.. If it is not working… give me your mail id.. I will mail you..
sorry for the inconvenience caused..
Thanks alot the the link work succesfully ^_^
I want to down load the file also and the button up doesn’t work, help me please or send it to my email .
Still not working. Any chance you could just email me the code, please?
Please try it now.. we have some server problems…
The Download button just takes me to the profile page!!! 🙁
honestly i dont know how to use micro c, i use pic c compiler, i try download micro c am having problem with it, if u dont mind doing this project for me on a pcb board i want to buy it and defend it for my final year project by december please..am ready to pay all the cost..
Please try it yourself….
1. Open the MikroC Project
2. Go to Project >> Edit Project
3. Change the MCU name to 16F877
4. Build >> Rebuild
Now your new hex file will be generated..
You can download it at above download link….
It was not working for some days.. Now the problem is solved..
Sorry for the inconvenience caused..
Thanks for the feedback.. 🙂
You can download it at above download link….
It was not working for some days.. Now the problem is solved..
Sorry for the inconvenience caused..
Sorry for the delay in replay.. I was busy ..
Try this link :http://www.electrosome.com/interrupt-pic-microcontroller/
I hope that mikroBasic should also have built in function for interrupt..
thanks..
sorry i dont know how to do that, can you help me and send me the hex file…[email protected]
i can not get the code.
Good Job, I hope for you the best ^_^.
how can i get the code???
Hi Ligo,
I need your suggestion to make my project success,
In my project i am using PIC16F72, monitoring(RB0) a signal from RF transmitter and its comes once in 10Sec of 1 Sec width. I need to run my code until RF signal present. If RF signal not received with in 15 sec code should not run further. How can i use the interrupts in this case
Please help me
That errors are simple syntax errors….. check syntax errors in your program……
and all the code should be written in that while loop… not outside it… even though it is not a syntax error…
sir,, i wrote the program you give to me…is that need to wrote if(8:00:00) after clock program or any specific column? for example
}while(1);
if(8:00:00)
when i run, the error said 260 406 ‘)’ expected, but ‘:’ found ..
can you explain more details to me..
hello sir,
i want to display the numbers from 1 t0 1000 in pic16f690 in LCD but it is not displaying.can you give some ideas to work with ascii characters
Sorry, I haven’t yet used mikroBasic..
Give me code in mikroBasic please,….f
I think your display is damaged.. try replacing with another..
Thanks for your feedback..
Try after rebuilding the code by changing the microcontroller to pic 16f877 in the mikroc project settings..
sorry can the hex file work for microcontroller 16f877 because i cant get microcontroller 16f877A here. thanks
sir,
my first project using your code is working well, thanks a lot.
Gururaj
Dear sir,
I am planning to buy pic compiler which compiler you suggest mikro c or Hi tech c.
Thanking you
with regards
Gururaj
4×1.5 = 6V……
use a 5.1V zener diode OR. put two 1n4007 diode in series to drop excess voltage..
hi sir! for 5v supply can i use (4) 1.5v battery.
I thing your circuit might have a short circuit… Please recheck the whole wiring………
Note that the you should press and hold the switch for some time (less than 500ms) to work…
Hello, all the program files including the hex file is present in the downloaded zif file..
hi sir! thats a nice project, 🙂 sir how can i identify if my rtc is really working or damaged?.. i did ur project and it really works, but on the second time around, i cannot set the corresponding time, the switches are not working and my rtc became very hot.. what should i do?..
i download it but i need hexfile pls send the hexfile only to my mail please.
You can download the program and proteus files through the above download link..
pls can i have the hexfile? “[email protected]”
I already said that .. you should split the delay of motor rotation as I indicated in the previous algorithm.. otherwise the time updation process will be interrupted..
but i want to use this program..how to combine it as i said before?? and the button to set,up and down still doesn’t working after i change the delay of button..
void main()
{
TRISD = 0; // PORT B as output port
PORTD = 0; // Set RB0 to high
do
{
// To turn led
PORTD.F7 = 1;
Delay_ms (10000); //10 seconds delay
// To off led
PORTD.F7 = 0;
// To turn motor clockwise
PORTD.F0 = 1;
PORTD.F1 = 0;
Delay_ms (1000); //1 seconds delay
// To stop motor
PORTD = 0; // PORTB = 3
Delay_ms (1000);
// To turn motor anticlockwise direction
PORTD.F0 = 0;
PORTD.F1 = 1;
Delay_ms (1000);
// To Stop motor
PORTD = 0; // (3=0b00000011)
Delay_ms (1000);
// To turn motor clockwise
PORTD.F2 = 1;
PORTD.F3 = 0;
Delay_ms (1000); //1 seconds delay
// To stop motor
PORTD = 0; // PORTB = 3
Delay_ms (1000);
// To turn motor anticlockwise direction
PORTD.F2 = 0;
PORTD.F3 = 1;
Delay_ms (1000);
// To Stop motor
PORTD = 0; // (3=0b00000011)
Delay_ms (1000);
}while(0);
}
just use if conditions …and splitting the delay…(to avoid interruption in the lcd display)
if(requied time)
{
flag = 50;
}
if(flag>0)
{
LED ON;
SMall delay, 100ms
}
else
LED OFF;
flag = flag – 1;
thus when the time is reached.. led will be ON for about 5 seconds (50x100ms)
Do like this…void interrupt()
{
clear display;
read adc vlaue;
print the value on display;
}
you can also do it without using interrupt..
yes..i have tried and it is working..thank you…but,how i want to combine my motor and led program with this clock? for example, i want the led on for 5 seconds and then the motor is moving for 10 seconds when the clock is at 8:00 a.m, 1:00 p.m and 9:00 p.m ??
sir, i want to combine two shematics: digital clock and digital thermometer. i adjusted the shematic(in proteus) fot adding lm35, the buttons are now in portd(porta.ra0 for lm35) and i maked the right setting for activating analog imput, But i dont know where in program of clock to add the thermometer sequence. i’ve tried tu use external interupt orTMR0 fot interupt routine but didnt work. were in program can i put the thermometer sequence? is something else to add?
Yes.. you are right.. .reduce the delay in the program as per your requirement..
I will help you, but please don’t ask me to design it completely.. I will help you technically…….. Use 4511 7 segment decoder..
i found it, button must be pressed much longer than usual because of “delay”, in proteus, i think…… 🙂
im using your code and schematic
sir, why button doesnt work? when i push each button nothig happen. but clock is running, in proteus i mean.
Can you help ds1307 with 7 segment 6 digit
Did you tried my project files..?? It is 100% working in proteus and hardware….. You needn’t connect I2C debugger if you are using correct pull up resistors… Use resistors that labeled PULL UP in proteus libraries.. check… Check stage by stage instead of testing it after wiring the whole circuit… fist time… then add motor.. etc..
i am using your micro c code,but lcd only display character “Time:” and “Date:” only…can you help me to correct the code and solve my problem to make this simulation successful? i really need your help…i am using pic16f877 and crystal 11.0592Mhz…
Ups, I´m programming with PICC CCS 🙁
The code is written for MikroC Pro for PIC Microcontrollers…
I think you are using some other compiler..
I have this error when compile c: “Error 128 dc.c, Line 2(1,3): A #DEVICE is required before this line”
thx for you
DS1307 is a BCD (Binary Coded Decimal) Clock.. so you should write hours as BCD..6th bit of the hour register determines whether the clock is 12/24 hour….. and 5th bit determines whether it is AM or PM when it is running in 12 hour mode…
The program given along this article is 100% working…
What are the values that has to be written to hours register if 12 hour format is selected. Mention all the values for 12 AM to 11 AM and 12 PM to 11 PM
This code is meant for PIC 16F877A not for PIC 16F877 and the compiler used here is MikroC. If you want to use 16F877, I hope that no code modifications are required but you should compile it after changing the microcontroller in project settings…
Dear Sir,
First, thanks for your explanations.
I tried to use your code on pic16F887 (instead of 877) it gives me compilation error on include library – include p16f887.inc (line 4)
I tried to eraze this line,finaly looking on my LCD I don’t see anything (resistors forSDA and SCL attached).
I use as power an old Nokia charger (5v output)
Can you , please, help me
Use 8MHz crystal for PIC and use Standard 32.768kHz Quartz Crystal for DS1307…
how much the value of the crystal for the microcontroller and the DS1307?
It is better to add over discharge protection…. You may use a voltage comparator for that…
Hi, thanks. I read that Li ion batteries doesn’t have to go below certain voltage 3.2v aprox to prevent over discharge, so i think i need some under voltage lockout circuit to prevent that.. or not?
Use PIC 16LF877A, a lower voltage version of pic 16f877a…. It can work at 3.7V…. For operating LCD, you can drop about 0.7V by connecting a 1N4007 diode in series..
Hi thank you very much, your website is awesome, i would like to feed this circuit with a 3.7v battery using a 3v LCD, but I’ve search a lot on internet regarding PIC’s on batteries but there’s little information about that, every one wants to use voltage regulators but that’s very inefficient, i think using a 3.7 v battery would be the best approach but there’s almost no information about the considerations of doing that, what do you think?
Thank you very much ..
Ligo, absolutely amazing circuits with great explanation. This is one of the best site in digital electronics world. It’s a great service to the community. Well Done!!!
i need this project .but i need a lil modification to it ,,, if u can help me with this i will be thank full to u …
i need an additional output port which will be triggered from 8.00 am to 8.00 pm or 8.00-20.00hrs
i need to trigger a 5v relay with the time ..
if any1 can help please i m not into programming but if i get the code and hex with crt diagram i will be thankfull
sir clock work perfectly.thanks for your help.sir i try to make 60 led (circle led indicate second) clock and led drive with 74hc595 but 60 led not indicate anything. how to write in mikro c code for this(led on one by one according to second). hope your help.
You can use while or.. do while.. for making infinite loop.. It will not affect the program..
The only difference between them is.. condition is checked before entering the loop in while() .. but in.. do..while() .. it is checked after the execution of the segment…. The program segment will execute once in do..while() even if the condition is false..
thank you sir for your reply, i write your clock code under the while loop.i dont use do-while loop.that is affect my programme?what is the different of do-while and while?
but my code work in proteus.
Did you connected Vdd and Vss of pic microcontroller which are not shown in the above circuit diagram?
First check your pic by doing LED blinking..
no pic out put signal.i write PORTD.F0=1; like code with clock code after power supply i check the F0 pin it is no out put signal.kindely help me.
What is the error in output?
seven segment sir.
It is 100% working.. we have tested it… In the first time.. the default time will be 00-00-80. .. and the clock will not be running..
We want to reset the second, to make the clock running..
What is the output of your hardware..??
Sir ,make your clock and pic 16f877a does not out put in hardware.why? sir can read ds1307 without write time ,date, in first time.
1st click on the set button.. then use other buttons to adjust hour… then click on the set button again.. then use other buttons to adjust minute… and so on..
when i click the push button there is no changes at the LCD.
It is working fine…. What is the problem in your proteus?
hye sir..sorry for interrupting..
Sir can u send me the hex file?It is because the existing hex file not working in my proteus.
Thank u so much sir for ur information..i really appreciate it..
Use Standard 32.768kHz Quartz Crystal for DS1307 and 8MHz crystal for PIC…
Use 2.2K resistors…
sorry sir. resistor that connected with pin 5 and pin 6 at DS1307. For crystal value is it okay If I used 20 000 H for both IC?
I don’t get your questions.. Which resistor??
what about the resistor at DS1307. Which resistor that i should use?Is it okay if I use 20 KH for crystal value.
There is no connection between 5 and 6… check the pull up resistors that you have used for SCL (6) and SDA (5). Use 2.2K or 1.8K…
hello sir..
i have construct the circuit in stripboard. When I put the IC and test the circuit, I found that the circuit didn’t work. When I press the push button there is no output in the lcd. I have troubleshoot the circuit and I found that there is connection at DS1307, between pin 5 and pin 6. I have reconstruct the circuit and the problem is still same. Can u give me the opinion how to solve the problem? Hope u can help me.
Thanks for your feedback..
yes sir,it is proteus problem.proteus animating time depend on animating options frames per second value.sorry for my mistake.your project is very useful.
To GAZ; change the frame value and run the project 🙂
It is working fine on my proteus.. It may the problem with proteus version.. I am using 7.10 ….. Just try after changing the value of I2C pull up resistors to 1.8K or 2.2K..
sir, i download your new zip file and it running slowly than normal time.please kindly help me and re-post the proteus design.
ok sir
thank you
You are welcome..
It is running real time in my laptop… When did you download the zip file?
Before a month there is a problem with the proteus design.. and I corrected it…
Check the proteus: Which are the Pull Up resistors connected to SCL and SDA ?…. use 2.2K or 1.8k…. in proteus better to use the PULL UP resistor from their library…
the time on this project it not running same like real time
seconds on this projects is running very slowly when we copare it with the clock of my house or my laptop and later it will effect the minutes my question is can you try to make seconds running like real time
and thank you again because you are the only one who answer my stupid questions
I don’t get your question..
thank you sir its ikay now
but when i copare seconds of this project and seconds on my laptop i see that theres a differnce and thats can effect the shown time can you correct it please to make no difference between this RTC and all otherRTC??
This link may help you..
http://www.electrosome.com/multiplexing-seven-segment-displays/
good morning sir
please can you help me to realize it with 4 sevent segment??
There is a bit in the hour register to set 12/24 hour mode.
done sir..thank you..by the way how do you set the rtc into 12hr mode??im having a hard time understanding the 6bit and 5bit of the registers..
You can compare the time from RTC with a predetermined time for that..
Sir, is it possible to take control of a specific interval of time in ds1307?(example) i want my device to be checking a sensor from 9:00:00am until 1:00:00pm..i want that my sensor should recognize the 4hr- time interval on which it would be checked over and over by the system..plss help me,thank you very much.
Ok sir..as in store the time date data of ds1307?im still newbie with this EEPROM,ill try it out,hope it will work.thank you very much.ill post an update later..
yes you can store time date etc in pic’s eeprom….
Ah, i see..but can i store (example) a minute data in EEPROM?and later i will retrieve the minute data and compare it with the another one? is EEPROM capable of storing the time data of the ds1307?..thank you very much again mr. george!
You may have some noise problems……….
Shorten the distance between pic and rtc and use recommended pull up resistors..
This is the first time output when you power the clock….. Check connections of switches… When you reset the second to 00 the clock will start running..
DS1307 RTC doesn’t use internal timer of PIC, so you can use the internal timer for other purposes.
ok i’ll try..i didn’t succeed with my other experiment with storing the minute, and i realized maybe i could use this CCP module..but im a little bit confused because it says there that it uses the internal timer of pic..now ill try expermenting it with the ds1307..if you have any sample programs for these hope you can help me..thanks.
time 00-00-80 i got this output but i cant edit the time using button
Sir I got the output but it is not stable and continuously changing.
sir i still got the same output..what should i do
Sir. how can I message you privately so that you can see my code It’s kind a long when I post it here…?
Yes.. of-course..
My proteus shows blinking cursor when I remove Lcd_Cmd(_LCD_CURSOR_OFF);
I think you can use vs1307. Error may be due to noise…. Try shortening the distance from PIC to RTC.
Which are the pull up resistors that you used?
You should use 2.2K or 1.8K…
hi sir. is it possible to replace ds1307 with vs1307. i looked up the pin config of the two and it’s just sam bu when i tried to use it the lcd, it only display (Time:10:=0:=0 AM) (Date:=0-=0-=0)
Sir will i be able to use the CCP module of pic16f877A with the ds1307 as the timer?
Yes, I’ll work on real hardware but the output is the same, not blinking when setting the HH:MM:SS, MO/DD/YR.
Isn’t you tried in Proteus?…
I think it will work in real hardware…. try it…….
………………………………
void main()
{
IC1_Init(100000); //DS1307 I2C is running at 100KHz
CMCON = 0x07;
TRISD = 0x0F;
PORTD = 0x00;
TRISB.F0 = 0;
Lcd_Init(); // Initialize LCD
Lcd_Cmd(_LCD_CLEAR); // Clear display
Lcd_Cmd(_LCD_BLINK_CURSOR_ON); // Blink Cursor
Lcd_out(1,1,”TIME:”);
Lcd_out(2,1,”DATE:”);
………………………………
if(set_count && set)
{
switch(set_count)
{
case 1:
hour = BCD2Binary(hour);
hour = hour + set;
hour = Binary2BCD(hour);
Lcd_Cmd(_LCD_FIRST_ROW);
Lcd_Cmd(_LCD_MOVE_CURSOR_RIGHT);
if((hour & 0x1F) >= 0x13)
{
hour = hour & 0b11100001;
hour = hour ^ 0x20;
}
else if((hour & 0x1F) <= 0x00)
{
hour = hour | 0b00010010;
hour = hour ^ 0x20;
}
write_ds1307(2, hour); //write hour
break;
…………..
that's my code and still not working…
The cursor will be shown on the LCD if you don’t turn off it..
Still not blinking. First I Use the command _LCD_BLINK_CURSOR_ON and put the _LCD_MOVE_RIGHT.
Lcd_Cmd(_LCD_CURSOR_OFF); ,,
Use other cursor control commands…
_LCD_FIRST_ROW –
Move cursor to the 1st row_LCD_SECOND_ROW
– Move cursor to the 2nd row
_LCD_BLINK_CURSOR_ON –
Blink cursor on
_LCD_MOVE_CURSOR_LEFT
– Move cursor left without changing display data RAM
_LCD_MOVE_CURSOR_RIGHT
– Move cursor right without changing display data RAM
For using EEPROM..you can use mikroc functions.. Eeprom_read() and Eeprom_write() …
http://www.electrosome.com/internal-eeprom-pic-microcontroller/
I tried that before my cursor blink at end of the date, basically it appear in 2nd row, 9th col. do you have a simple example of EEPROM. if I’m mistaken it is like NVRAM store data when the power is lost. BTW thank you! 😀
Try after removing Lcd_Cmd(_LCD_CURSOR_OFF);
from the code…..
For setting alarm you may store the time in PICs EEPROM, and compare with time reading from RTC..
ok thank you, question sir. how can I see the cursor while doing the setting mode in LCD and how can I set an alarm in ur prog.
Yes, of-course you can use,,,.. but a keypad just for setting a time makes an unwanted expense …
Instead of using of 2 buttons for increment and decrement can I use 4×3 keypad in your code? BTW thank you to your site I learned alot. 😀
previousMin = minute; this statement wil execute more than one time when f4 & f5 of portb are high….. It should be executed once to work this program correctly…. ..
Sir..i just tried a piece of code,but it does not work..pls inspect:
////////code//////////////////////////
if(PORTB.F4 == 1 && PORTB.F5 == 1)
{
minute = read_ds1307(1); //i tried to read the time where the 2 ports where high
previousMin = minute; ///stored min to previous
Lcd_cmd(_LCD_CLEAR);
Lcd_out(1, 1, “detected”);
delay_ms(1000);
if(PORTB.F4 == 1 && PORTB.F5 == 1)///check again if the ports are high
{
minute = read_ds1307(1); //read again the minute
currentMin = minute;//stored the minute to current
if(previousMin != currentMin && (PORTB.F4 == 1 && PORTB.F5 == 1)) //compare the 2 variables and check 2 ports state
{
counterM++; //increment the counter
if(PORTB.F4 == 1 && PORTB.F5 == 1) //check again the ports
{
if(counterM == 2) ///check the value of counter
{
Lcd_cmd(_LCD_CLEAR);
Lcd_out(1, 1, “overloaded”);
delay_ms(2000);
//break;
}
}
}
}
}
//////////end of code/////////////////
pls help me..i really wasn’t sure with the part (minute = read_ds1307(1))..pls help me,.thank you..
thank you sir..i’ll do it again..hope this time it will work..ill update again with the progress..thank you very much!
if(previous != current && port == 1)
count ++;
it doesn’t seem to work..i tried storing minute in 2 separate variables like what you said..here’s what im trying to do..example..if a pin goes high at 9:00:00, i will store 00min in a variable and if it changes to 01,and the pin is still in high state, a counter variable will increment(count++),..my problem is how will i know if the minute has already changed from 00 to 01?,,im really confused..i tried what u said, but not working..(maybe i did not do it correctly)..please help me..thank you.
it doesn’t seem to work..here is what im trying to do..example: if a port is high at 9:00:00, i want to store the 00min in a variable and when it changes to 01 and the port is still in high state, a counter variable will increment(count++)..my problem is how will i know if the minute has already changed from 00 to 01?i tried storing minutes in separate variables but it seems like it does not recognize the minute data i stored..please help me…thanks.
Ok then..i’ll try it…thank you very much sir!
Store current and previous minutes in two variables….
if(current != previous)
count++;
i already did..i tried storing minute in a separate variable..(like j = minute..) but im confused how to count the next change of minute.,sorry if you dont understand my question..i want to make a counter variable which will increment everytime the value of minute changes..i’m really confused..please help me..thanks..
Actually I don’t get your question,…… I think you may store minute in a separate variable….
Hey mr. George,,thanks again with the help..will you please help me again,i would like to count every change of minute on the time..but i’m confused how to make a somewhat like counter variable which will hold/count the value of the change in minute..ex,time is 9:00:00..if min became 01..the counter should count 1..and so on..please help me..thanks…
DS1307 can work in 12 / 24 hour mode by using the bit 6 of hour register..
Press the set button 1st, then you can change hour using + & – buttons, then press set button, then you can change minute & so on,
Yes you are right, we need only the last 5 bits of hour…
this is the comment that I gave before but now its working.
Sir, Now its working. but not the correct way. I have tried to put the”hr” variable in Bcd2dec(hr) instead of direct reading from RTC and then made portB.F7=1; and its now working. But then is the data from RTC is not BCD? or “hr” variable is BCD? I did’nt understood! I guess in hr = hour & 0b00011111; you are masking some bits of BCD…
Sir..it worked!!thank you very much..just want to ask,how do you configure the clock to be 12-hour clock not 24 hour clock? thank you..
Sir its not working.its just showing logic 0.
No, PORTB.RB7 is not valid, for every pic microcontroller PORTB.F7 is valid… in mikroc.. pro.
Thank you sir! but I am using PIC16F628A so its PORTB.RB7. I will try with it.
PORTB.RB7 ?? use PORTB.F7 = 1;
or RB7_bit = 1;
use like this
if(Dhour == 11)
{
PORTB.F7 = 1;
Delay_ms(3000);
PORTB.F7 = 0;
}
Ok sir..thank you very much..
Yes… just program it… if(month == 1) print January etc…
for conversion you can also use the built in library routines of mikroc pro
means only month and day or with time and date? if yes then its possible…
sir here is the modified code: sir I have tried your code with PIC16f628A using soft I2C and was succesful. But not working what I am trying.
// Software I2C connections
sbit Soft_I2C_Scl at RB4_bit;
sbit Soft_I2C_Sda at RB1_bit;
sbit Soft_I2C_Scl_Direction at TRISB4_bit;
sbit Soft_I2C_Sda_Direction at TRISB1_bit;
// End Software I2C connections
// LCD module connections
sbit LCD_RS at RB0_bit;
sbit LCD_EN at RA1_bit;
sbit LCD_D4 at RB2_bit;
sbit LCD_D5 at RB3_bit;
sbit LCD_D6 at RB5_bit;
sbit LCD_D7 at RB6_bit;
sbit LCD_RS_Direction at TRISB0_bit;
sbit LCD_EN_Direction at TRISA1_bit;
sbit LCD_D4_Direction at TRISB2_bit;
sbit LCD_D5_Direction at TRISB3_bit;
sbit LCD_D6_Direction at TRISB5_bit;
sbit LCD_D7_Direction at TRISB6_bit;
// End LCD module connections
sbit Sett at RA2_bit;
sbit Inc at RA3_bit;
sbit Dec at RA4_bit;
unsigned short read_ds1307(unsigned short address)
{
unsigned short r_data;
INTCON.GIE=0;
Soft_I2C_Start();
Soft_I2C_Write(0xD0); //address 0x68 followed by direction bit (0 for write, 1 for read) 0x68 followed by 0 –> 0xD0
Soft_I2C_Write(address);
Soft_I2C_Start();
Soft_I2C_Write(0xD1); //0x68 followed by 1 –> 0xD1
r_data=Soft_I2C_Read(0);
Soft_I2C_Stop();
return(r_data);
INTCON.GIE=1;
}
void write_ds1307(unsigned short address,unsigned short w_data)
{
INTCON.GIE=0;
Soft_I2C_Start(); // issue I2C start signal //address 0x68 followed by direction bit (0 for write, 1 for read) 0x68 followed by 0 –> 0xD0
Soft_I2C_Write(0xD0); // send byte via I2C (device address + W)
Soft_I2C_Write(address); // send byte (address of DS1307 location)
Soft_I2C_Write(w_data); // send data (data to be written)
Soft_I2C_Stop(); // issue I2C stop signal
INTCON.GIE=1;
}
unsigned char BCD2UpperCh(unsigned char bcd)
{
return ((bcd >> 4) + ‘0’);
}
unsigned char BCD2LowerCh(unsigned char bcd)
{
return ((bcd & 0x0F) + ‘0’);
}
/** Bcd2Dec**/
unsigned short Bcd2Dec(unsigned short bcdnum) {
unsigned short tmp = 0;
tmp = (bcdnum >> 4) * 10;
tmp += (bcdnum & 0x0F);
return tmp;
}//
int Binary2BCD(int a)
{
int t1, t2;
t1 = a%10;
t1 = t1 & 0x0F;
a = a/10;
t2 = a%10;
t2 = 0x0F & t2;
t2 = t2 <> 4;
t = 0x0F & t;
r = t*10 + r;
return r;
}
int second;
int minute;
int hour;
int hr;
int day;
int dday;
int month;
int year;
int ap;
unsigned short set_count = 0;
unsigned short set;
unsigned short i;
unsigned short Dhour;
unsigned short Hcnt;
char time[] = “00:00:00 PM”;
char date[] = “00-00-00″;
void Check_time() //here I am converting bcdtodec
{
Hcnt=read_ds1307(2);
Dhour=Bcd2Dec(Hcnt); //saving the value in variable
}
unsigned short counter;
void interrupt(){
if (INTCON.T0IF) {
if (counter >= 20) {
Soft_I2C_Break();
counter = 0; // reset counter
}
else
{
counter++; // increment counter
INTCON.T0IF = 0; // Clear Timer0 overflow interrupt flag
}
}
}
void main()
{
CMCON = 0x07; // To turn off comparators
// ADCON1= 0x06; // To turn off analog to digital converters
TRISA = 0b00011100;
TRISB = 0x00;
//ANSEL=0;
OPTION_REG=0x07;
INTCON=0b10100000;
PORTB.RB7=0;
Lcd_Init(); // Initialize LCD
Lcd_Cmd(_LCD_CLEAR); // Clear display
Lcd_Cmd(_LCD_CURSOR_OFF); // Cursor off
Lcd_out(1,1,”Time:”);
Lcd_out(2,1,”Date:”);
Soft_I2C_Init(); // Initialize Soft I2C communication
do{
set = 0;
if(Sett == 0)
{
Delay_ms(100);
if(Sett == 0)
{
set_count++;
if(set_count >= 7)
{
set_count = 0;
}
}
}
if(set_count)
{
if(Inc == 0)
{
Delay_ms(100);
if(Inc == 0)
set = 1;
}
if(Dec == 0)
{
Delay_ms(100);
if(Dec == 0)
set = -1;
}
if(set_count && set)
{
switch(set_count)
{
case 1:
hour = BCD2Binary(hour);
hour = hour + set;
hour = Binary2BCD(hour);
if((hour & 0x1F) >= 0x13)
{
hour = hour & 0b11100001;
hour = hour ^ 0x20;
}
else if((hour & 0x1F) = 60)
minute = 0;
if(minute = 0x32)
day = 1;
if(day 0x12)
month = 1;
if(month <= 0)
month = 0x12;
write_ds1307(5,month); // write month 6 June
break;
case 6:
year = BCD2Binary(year);
year = year + set;
year = Binary2BCD(year);
if(year = 0x50)
year = 0;
write_ds1307(6, year); // write year
break;
}
}
}
second = read_ds1307(0);
minute = read_ds1307(1);
hour = read_ds1307(2);
hr = hour & 0b00011111;
ap = hour & 0b00100000;
dday = read_ds1307(3);
day = read_ds1307(4);
month = read_ds1307(5);
year = read_ds1307(6);
time[0] = BCD2UpperCh(hr);
time[1] = BCD2LowerCh(hr);
time[3] = BCD2UpperCh(minute);
time[4] = BCD2LowerCh(minute);
time[6] = BCD2UpperCh(second);
time[7] = BCD2LowerCh(second);
date[0] = BCD2UpperCh(day);
date[1] = BCD2LowerCh(day);
date[3] = BCD2UpperCh(month);
date[4] = BCD2LowerCh(month);
date[6] = BCD2UpperCh(year);
date[7] = BCD2LowerCh(year);
if(ap)
{
time[9] = ‘P’;
time[10] = ‘M’;
}
else
{
time[9] = ‘A’;
time[10] = ‘M’;
}
Lcd_out(1, 6, time);
Lcd_out(2, 6, date);
Delay_ms(50);
Check_time(); //here i am checking time
if(Dhour==11) //if its 11 then make RB7=1
{
PORTB.RB7=1;
}
}while(1);
}
but its not working
is it possible to display month and day with its name ?
Ok sir..thanks,i’ll try fixing it again,hopefully it would work now..thank u very much for the help..i already made the I2C lines shorter,,about 1.5 inch now..by the way with your code in converting BCD, do i still have to change anything there coz im using a pic18f4550(4mhz crystal)..and in your proj you used a pic16f..thanks,
It may be due to noise, these devices are very sensitive to noise. First make your power supply free of noise by adding filtering capacitors………. Shorten the distance of I2C lines and place it close to pic microcontroller..
sir..i wasn’t able to come up with the output you were saying earlier (00-00-80) the time and date displays on the lcd as soon as i plug it in with a supply..but the time and date was not stable,.keep on changing almost every second. plss help..thanks..
I can’t find the real problem without the circuit and entire program….
Try this : turn light off when needed and on otherwise..
sir I have set light to 0 or off and then burned the program but its again on always but not at that time!
Try this: first turn off the light……….. then turn on it when needed…
You can use 10K.. as in proteus design.
I didn’t turn off the light first I am trying to make just a routine which will check time and if it matches the routine time then it should make the “light” to logic one. but its always on!
Ok sir..thank you very much..by the way what is the value of the 3 pull ups on the switches and the Var Resistor? i followed the value on your proteus design, thanks again for the help.
12 inch is very large……. Make it short as possible..
Ok sir..i’ll try it then..ill update again if i encounter problems..thank you very much,.i had a wire connection for SCL &SDA almost 12inches..is it ok?
It is difficult to find out the problem of your code by evaluating this segment only…
Where did you turn off the light..??
You may use a good power supply,,,,,,,, or Try after adding a 100uF capacitor near to pic microcontroller to filter ac voltages…
Keep the length of I2C (SCL & SDA) between pic and RTC as minimum as possible…
Yes, i used 1.8K resistor as pull ups for my SCL and SDA..im curious because when i use PICkit2 as a supply voltage,it displays time but not stable (the time and date changes almost every second) and as i said earlier when i supply it with an external power supply for my actual hardware,the time doesn’t appear anymore..thanks by the way for the help..i’ll try checking again my pin connections. thank you.
Check your LCD data pins connections…… interchanging data pins results in unexpected characters…
Pull UP resistors of SCL and SDA should be close to 2K…..
Sir..I have tried it with my actual hardware..it doesn’t show anything on the LCD only a series of small rectangles (like this ==============) on top of the LCD..i am very sure i followed everything in your program and schematic..help me pls.thanks!
Sir
I have tried to make alarm in this project by modifying your code. Like I have used a int variable and converted your hour variable data to Decimal by using BCDTODEC16 in Mikroc as shown below:
void Check_time(){
hour=read_ds1307(2);
Dhour=Bcd2Dec16(hour);
}
The Dhour is variable and I have used it in Main :
Check_time();
if(Dhour==12) // checking if its 12 o clock
{
Light=1; then switch on light
}
But practically its not working! will you please help me sir?
Ah i see..thank you very much..i’ll try it out..i’ll update you if it is ok now..thanks a lot!
Proteus simulation will show the time in your PC.
When comes to actual hardware, when you switch on the power supply it will show time 00-00-80… then you need to set the time..
Sir..i have tried your program in my project.,but i am using a pic18f4550 so i modified a little with the ports in the code..i was able to get the time running in my lcd but the problem is it seems that the rtc was synchronized with the clock in my pc.,i use my pickit2 in supplying voltage,but when i use a separate power supply, time in rtc does not display on lcd..what seems to be the problem?
Time settings are like a digital watch….
1 press at set switch then you can change hour..
then 1 more press you can change minute..
and so on
Sir how to change time using Set,+,- switches? when I try to change date changes!
ok..tq sir..
I created the file using proteus 7.6… but before 1 week I edited the file with proteus 7.9 ……….
good afternoon sir..
can i know what version of proteus that you use?
because the proteus file cannot be open at my laptop..
tq sir.
Sorry, it was a problem with proteus design…..
I edited and upload the new file….
Please redownload the file……..
good morning sir
i was fortunate by downloading this project and im very happy for that but i got a little problem thats when the lcd dispalying time i see that theres a difference between the real time and your time on lcd in second digit its not running at the same time with the real second clock please can you help me to figure out this problem and realize my personal seven segment clock??
No they are used defined libraries……….. You can download it above..
The program is lengthy so I didn’t included in the article………
sir is BCD2upperCh/lowerCh are library routines present in mikroC?
Pull up and pull down are common resistors ………..A resistor is called pull up when it is used to make HIGH a node……… while a resistor is called pull down when it is used to make a node LOW
I will try that… hope you can follow up my question because I don’t know about PIC… there is the hardware for pullup and pulldown resistor or just use the common resistor??
to make a pin high for 3 seconds at a particular time :
if(hour == 5 && min == 40 && sec == 00)
{
PORTD.F0 = 1;
Delay_ms(3000);
PORTD.F0 = 0;
}
This code makes 19th pin of microcontroller high at 5:40
PORTD.F0 = 1 makes its output 5v while
PORTD.F0 = 0 makes it output 0V
there is the program that you mentioned or such to understand me about connection. PORTD.F0 = 0 makes it output 0V… I don’t understand this…
Pull up and Pull Down are two resistors………….. As its name indicates pull up is used to make a pin (or node) high while Pull Down is used to make a pin (or node) low……..But in the circuit I used 10K ohm resistors instead of Pull up and pull down…..
You can connect a buzzer to any of the output pin of the PIC…………and program it………For eg: if you connect buzzer to 1st pin of PORTD (19th pin)
PORTD.F0 = 1 makes its output 5v while
PORTD.F0 = 0 makes it output 0V
what is pullup and pulldown in proteus??
but i don’t know which pin that connect to PIC… help me sir…pliss
Yes, for alarm you may connect a Buzzer to PIC Microcontroller…..
can I put the alarm for this circuit but I don’t know how to program.. can you help me on this…
It is I2C Debugger………………… No need of it for hardware implementation ….
sir, can you tell me what is the specific component of i2c in proteus…where i can get that hardware… help me sir… thanks
check whether the sda & scl pins are connected properly and pull up resistor is connected properly………..
i
8MHz………….. you can use 4 or 8 or 20…..
pls, can you tell me the size of crystal for the PIC .
i have read sir ..i am getting where is prob….8051 kit is working properly but only DS1307 kit is not working properly as i think …….please suggest me what can i do.
to 8051 kit ? …….. DS1307 and its crystal are very sensitive to noise…So please read the datasheet of DS1307 before designing the pcb ……
HELLO SIR…..i have done my proteus simulation and and it works properly but in hardware lcd doesnot show any thing ….is there any precaution or special arrangement to connect DS1307 IC to 8051 kit…..
thank you.
Are you using MikroC Pro..?? ……..
if yes……..open a new project, copy paste the code there and compile……
i have this p`roblem
in the line 1
function main not definied
It may be the problem of power supply………PICKIT3 supply’s the 5v supply needed for the pic……..when it is disconnected the sudden change in the supply voltage affects it working………Use a 100uF capacitor across the VCC and VSS…….I think it will solve it.
I just figured out what the problem was, I was using a PAD trainer for my 5 volt power supply. When I switched to another variable power supply I have, the clock now works as it should with or without the PICKIT connected. FINALLY!
I successfully loaded this program on a PIC16F877a chip and it does work so long as the PICKIT 3 that is used to program the chip remains connected. As soon as I disconnect the PICKIT, the time on the LCD stays fixed. If if flip the power off and back on (on the PIC16) then it will refresh the time back up to date. My question is why doesn’t the PIC16 seem to run when the PICKIT is no longer connected. I’ve tried playing around with the registers and so far have no luck 🙁 Any ideas? Mycircuit is the same as the one in the article.
I don’t understand you…Please elaborate…….
hi,
characters for set is not blanked ?
Thanks
it is OK now, i replace my version by cracked one.
Ahmed Ramadan
Some of my friends said that, crack is available… …search for it………
it is OK now, but i want to enhance on my project “Smart incubator
Machine with Temp, Humidity, Fresh Airing, Motor for flipping, serial
Interfacing and RTC for calculating Hatching Time Interval”.
But the mikroc pro V4.6 with me is Limited in Code editing, is there any idea instead of buying Mikroc Pro, could you help me.
Thanks for replying
Ahmed Ramadan
I am using MikroC Pro v4.60 …………..Open the dc.c file in text editor and copy paste, then compile……….
Good job
as for Proteus File, which version you used?, because MikroC Pro v4.6 can not open this file. waiting you ASAP.
Thanks
Ahmed Ramadan
Yes. the compiler…..MikroC Pro for PIC
tienes los codigos de c compiler’?