LED Chaser using PIC Microcontroller
LED Chaser is a simple project for beginners that can build using PIC microcontroller. In this 8 LED are running like a Ring Counter. It is very simple and you can create different patterns as you like just by modifying the MikroC program. Here I am using PIC16F877A, one of the most popular PIC microcontroller.
This tutorial is on the assumption that, you have basic knowledge in mikroC and Proteus. If you haven’t please go to this tutorial.
MikroC Code
void main()
{
  CMCON = 0x07; // To turn off comparators
  ADCON1 = 0x06; // To turn off adc
  TRISB = 0x00; // Sets all pins in PORTB as output
  PORTB = 1; // Set RB0 to high 00000001
  do // To set infinite loop
  {
    Delay_ms(300); // 300 mili seconds delay
    PORTB = PORTB<<1; //Shifting right by one bit
    if(PORTB >= 0b10000000) //To reset to 00000001
    {                          //when the count becomes 10000000
       Delay_ms(350); // 350 mili seconds delay
       PORTB = 1;
    }
  }while(1); // To set infinite loop
}
Here we first set the output of PORTB as 0000001, then by shifting we get 00000010, 00000100….. When the count reaches 10000000 we reset it to 00000001 in the conditional block.
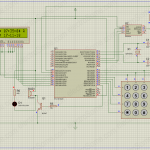
Circuit Diagram
Note: VDD and VSS of the pic microcontroller is not shown in the circuit diagram. VDD should be connected to +5V and VSS to GND.
LED is connected in series with a resistor of 1K ohm to limit the current through it.
Download Here
You can download the Hex file, MikroC file, Proteus etc from here…





hi sir,
i m using above code, it is working but delay what you have mentioned is not exact 300 msec. if i change it to 1000msec, my led will take 3sec turn on…can u pls suggest how to generate exact delay time
Hi,
Sorry your question is outside the scope of above article. Please use our forums ( https://electrosome.com/forums ) for asking such doubts.
hey sir please help me.. i have lab exercise to develop a micro c code for the system by using the port B pin change interrupt method . the system is when students are going to the presentation they push the buttons related to the project type (cptp,mini,final project). two seven segment displays will decrease from 20 or 15 or 10 minutes and when they zero led will flash indicating the end of presentation.. please give some hint for c code ….
What error ?
I AM LITTLE BIT UNDER STAND THE PROGRAM
I NEED THE PROGRAM
this program some error i need your help sir
sir i have one problum “4 324 Undeclared identifier ‘ADCON1’ in expression MyProject.c” wt i do?
hi sir,
my project is WINDMILL POWER BASED IRRIGATION SYSTEM.please help me how to develop using pic controller,& how to develop code for it..
Hope this article might help you to start a new project in mikro c
http://www.electrosome.com/led-blinking-pic/
Dear sir ,
I download the Micro c Free ware version compiler and program is not generate the hex file how to generate the hex file ?
Hello, this code is meant for MikroC,.. not for MPLAB as given in the article..
Ha Ha Ha Ha …………………………………….
Sir Led is not glowing Ha Ha Ha Ha ………………………
Dear sir ,
Start again , which type of the tools are required in this project like as
1. Pic kit 3
2. Mp lab software
3 ……………………..
4 …………………….
Etc
How to run this project plz help me .
Dear sir ,
u have any procedure for generating the hex file ?
Dear sir ,
My Mp lab software does not generate the hex file .
It should also contains a software called PICKit3.. use that software…
Connect the VPP, VDD, VSS, PGD, PGC of the pic microcontroller to the corresponding pins of PICKit3 .. then connect it to your pc.. open the software….. erase the pic… load the hex file.. write……. verify it..
Dear sir ,
i have pic kit 3 device and mp lab ide software is free with pic kit 3 .
you need a pic programmer to write this program to pic microcontroller.. .Try making one.. here is the link..
http://www.electrosome.com/pickit2/
This is a mikroC project.. not mplab hi tech c………
Dear sir ,
I have try many time progrme is save in the editor. or go to the mp lab IDE project wizard and open the file and selct the compler or micocontroller enter
this file not runnign and i select the left click an doptation is Compile it then i do it and a message is compiling or outout is bulding sucesfuul
but afte puting the mico inproject then led not blinking. pin vdd and vcc also check.
How to program insert in the pic ?
Nothing wrong with it…
I already said that you should connect Vdd and Vss of the pic microcontroller to +5 and Gnd respectively.. which is not shown in the above circuit diagram…
PINs 11,32 – Vdd – +5V
pins 12,31- Vss – GND
i changed the microcontroller but still doesn’t work and i test the microcontroller it work good the problem is that i got no signal out from portB but when pin 11 is connected to +5V i recieve +5V on pin 32 i dont know whats wrong with that
thank you again sir im beginner and i need you help please
Then you burned your microcontroller… probably you may have some error in connection………. connect +5 to Vdd and GND to Vss…… … if you connect it in wrong way .. it will burn your pic..
soory sir even with one led it doesn’t work maybe should i have change the microcontroller??
because after long time on +5V it will be very hot and had abnormal smell??
thx again sir
i will try the first project now
thx you sir for the reply
No, there is no other configurations…
Did you connect Vdd and Vss of the pic microcontroller to 5V and Gnd respectively?
Didn’t you tried the first project of blinking Led ?
PLEASE TELL ME SIR WHY THIS PROJECT WORK ON ISIS AND IT DOESEN4T WORK IN REAL LIFE
THERES SOME CONFIGURATION WE HAVE TO DO??
PLEASE HELP ME SIR
ALL MY REGARDS
Thanks for the feedback….
P.S.- with the same circuit!
This is a great tutorial! I am using the 16f877 and it works fine too! I just had to omit switching off the comparators. It even made me think of this:
void main()
{
ADCON1 = 0x06; // switching off ADC
TRISB = 0x00;
PORTB = 0x01;
while(1)
{
Delay_ms(300);
do
{
PORTB = PORTB<>1;
Delay_ms(300);
}while(!PORTB.F0);
}
}
Thank you ………
grt tutorial to learn pic….post …more