Flashing LPC2148 – ARM Microcontroller Tutorial – Part 2
Contents
In this tutorial we will learn how to flash an LPC2148 microcontroller using on-chip serial (UART) ISP bootloader with Flash Magic tool.
Components Required
- LPC2148 ARM Microcontroller
- USB to UART converter with DTR and RTS outputs.
You may also use ready to go boards like rhydoLABZ LPC2148 Stick.
Connections

Circuit Diagram

Using Flash Magic Tool
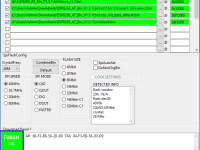
Above we seen how to make connections for serial ISP programming. In this section we will see how can we use Flash Magic tool for flashing LPC2148 ARM microcontroller.
Download
You can download flash magic software from flashmagictool.com. In this tutorial I am using version 12.70, which was the latest one while writing this tutorial.
Installing
- Run the FlashMagic.exe and install the tool. You can leave all options as default.
Flashing
- Open the flash magic tool, after completing the installation.

- Click “Change” button to change the microcontroller.

- Select LPC2148 and click “OK”
- Make sure that you have connected the device (USB to Serial Converter) to your PC.
- Select the Serial Port (You may open the device manager and check if you have any confusion regarding the serial port).
- Set Baudrate as “9600”
- Select the hex file you like to program. You may download the demo hex file (led blinking) given at the end of this article for testing.

- Click “Start” button to start flashing and make sure that you are not getting any errors during this process.

Hex File
You can download the demo hex file here, this will blink an LED connected to P1.16 pin.


